Section: 27
Hours: 4
I thought about how to get to the rivets next to the tunnel walls last night and here's my solution. The long flush rivet set to the rescue!
The area where the center panel ties into the other panels was the hardest to rivet. It was hard to get the back rivet plate / bucking bar into the corners to make sure the rivets stayed flush.
Here's the nicely curved tunnel face at the firewall.
All the rivets are flush on the front side of the firewall.
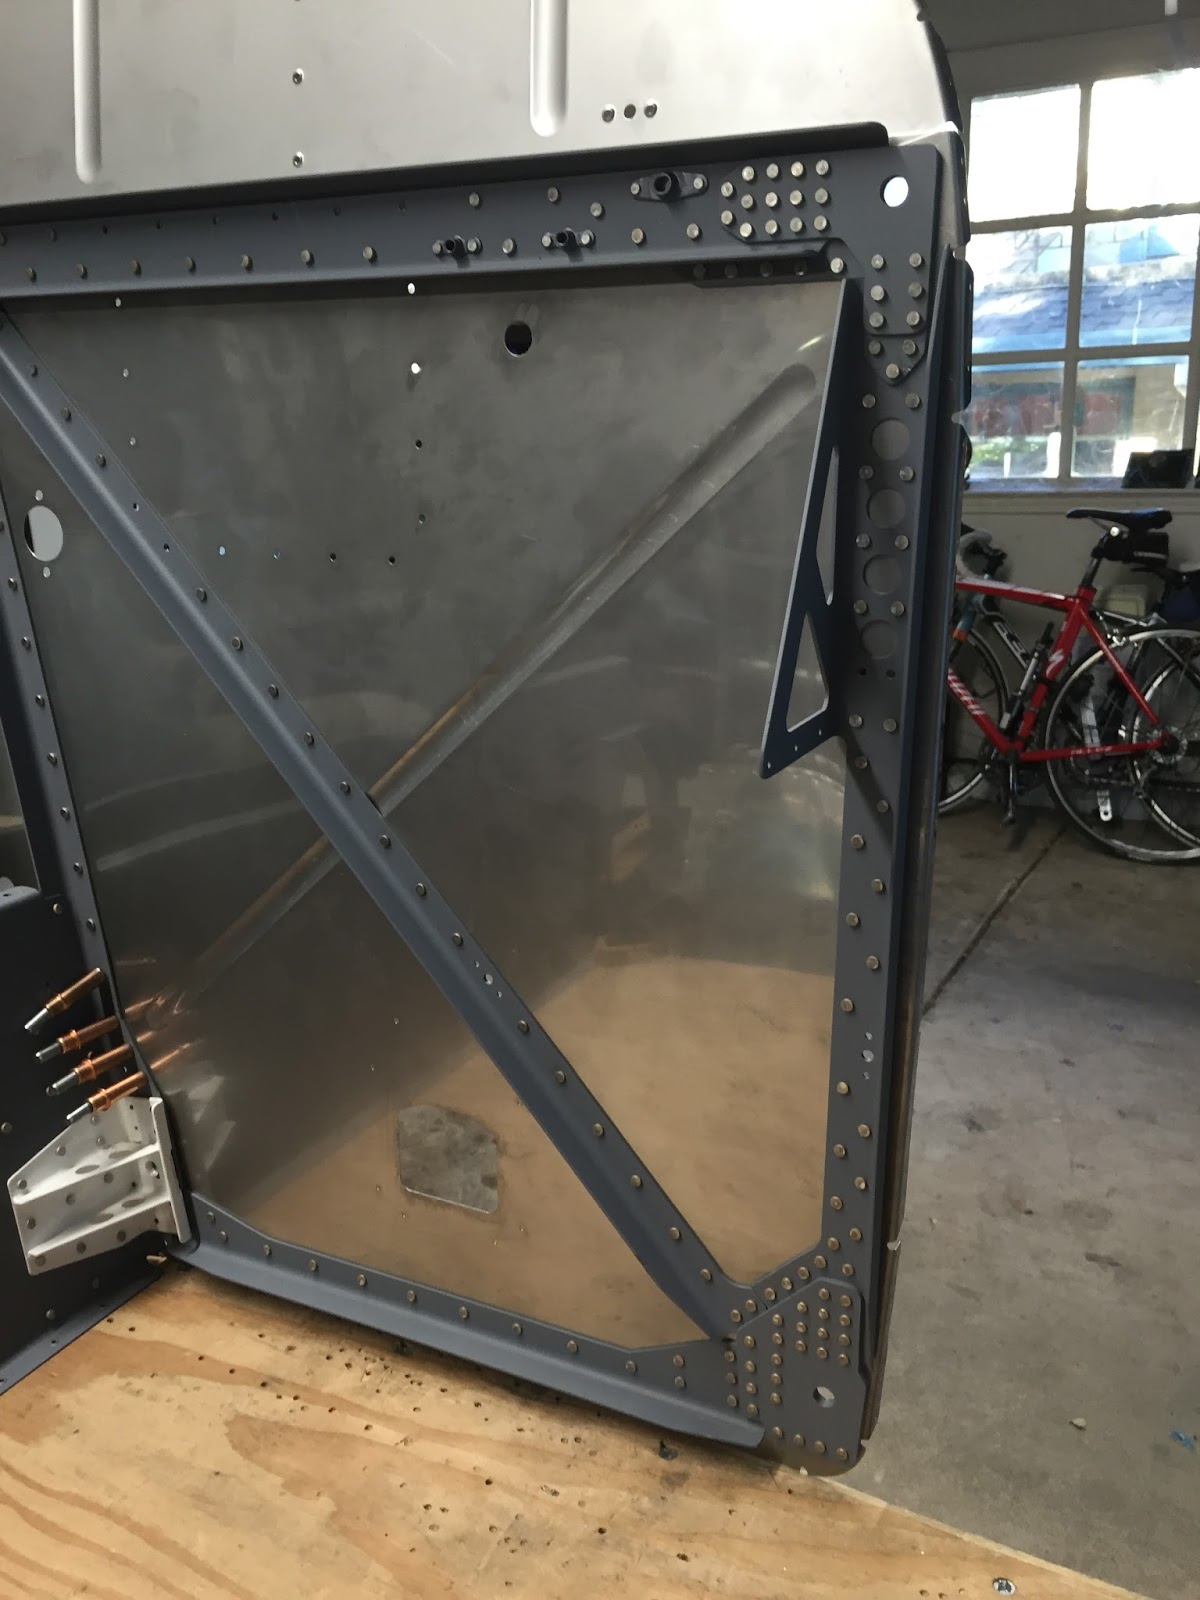
Here's what all those rivets are for- lots of structural angles on the back of the firewall. That's it for section 27!
Disclaimer: This blog is to provide others insight into my experience and for my own historical purposes. Airplane construction is a serious affair. I have no authoritative skills relating to airplane construction. As such, any use of the information contained on this blog is at your own risk.
Showing posts with label Section 27. Show all posts
Thursday, June 23, 2016
Wednesday, June 22, 2016
Section: 27
Hours: 7
The construction manual has you tape off a set of holes that are not dimpled or counter sunk. The initial builders found errors in the holes that were called out and it took 2 revisions to the plans before the factory engineers got it right. I though I was staying on top of the changes, but I ended up countersinking too many of the holes in the F-1401D cross stiffener. I considered ordering a replacement but then I read more about what the first builders did. It turns out you can order conical washers to insert in the countersink. I didn't want to wait around for an order to arrive, plus the minimum order is for hundreds and I only need 4. So I made my own washers by carefully drilling out and filing down some counter sink rivets.
Here I've put the washers in the holes with a very small dab of ProSeal to hold them in place until I assemble the stiffener.
The instructions have you ProSeal the edges of the upper panel and center piece where they overlap the lower panels. You don't want carbon monoxide or hot gasses leaking through the firewall into the cabin and the ProSeal insures the integrity of these joints.
I back riveted all the rivets today. It took a lot of time and patience to line up the bucking plate/bar to work around all the edges of the overlapping pieces and the diagonal fluting. Complicating all this was the ProSeal oozing out and getting on everything.
I got most of the heavy riveting done today, but I still have to figure out how to get to the rivets around the nose gear brackets. The holes in the corners are for the bolts that secure the engine mount to the firewall. Lots of reinforcement layers and rivets to carry the engine loads.
Hours: 7
The construction manual has you tape off a set of holes that are not dimpled or counter sunk. The initial builders found errors in the holes that were called out and it took 2 revisions to the plans before the factory engineers got it right. I though I was staying on top of the changes, but I ended up countersinking too many of the holes in the F-1401D cross stiffener. I considered ordering a replacement but then I read more about what the first builders did. It turns out you can order conical washers to insert in the countersink. I didn't want to wait around for an order to arrive, plus the minimum order is for hundreds and I only need 4. So I made my own washers by carefully drilling out and filing down some counter sink rivets.
Here I've put the washers in the holes with a very small dab of ProSeal to hold them in place until I assemble the stiffener.
The instructions have you ProSeal the edges of the upper panel and center piece where they overlap the lower panels. You don't want carbon monoxide or hot gasses leaking through the firewall into the cabin and the ProSeal insures the integrity of these joints.
I back riveted all the rivets today. It took a lot of time and patience to line up the bucking plate/bar to work around all the edges of the overlapping pieces and the diagonal fluting. Complicating all this was the ProSeal oozing out and getting on everything.
I got most of the heavy riveting done today, but I still have to figure out how to get to the rivets around the nose gear brackets. The holes in the corners are for the bolts that secure the engine mount to the firewall. Lots of reinforcement layers and rivets to carry the engine loads.
Section: 27
Hours: 5
I back riveted the firewall angles to the firewall panels. Lots of AN426AD4 flush rivets. I'm finding it rather cumbersome moving the back riveting plate around to avoid dinging the flute that runs diagonally across the stainless sheets.
Here's the left and right firewall panels with the bracing riveted on. Tomorrow I'll begin riveting the top panel and angles.
Hours: 5
I back riveted the firewall angles to the firewall panels. Lots of AN426AD4 flush rivets. I'm finding it rather cumbersome moving the back riveting plate around to avoid dinging the flute that runs diagonally across the stainless sheets.
Here's the left and right firewall panels with the bracing riveted on. Tomorrow I'll begin riveting the top panel and angles.
Monday, June 20, 2016
Section: 27
Hours: 6
I riveted the nut plates, firewall angles, cover angle brackets and nose gear brackets to the tunnel sides. My plane doesn't have nose gear, but apparently the brackets are needed anyway.
Next I dimpled the left and right fire wall stainless panels and started riveting the angle braces on. I'm back riveting these using the rv-14 "special" bucking bar. It's long and narrow enough to fit around the structural dimpling in the stainless steel.
Hours: 6
I riveted the nut plates, firewall angles, cover angle brackets and nose gear brackets to the tunnel sides. My plane doesn't have nose gear, but apparently the brackets are needed anyway.
Next I dimpled the left and right fire wall stainless panels and started riveting the angle braces on. I'm back riveting these using the rv-14 "special" bucking bar. It's long and narrow enough to fit around the structural dimpling in the stainless steel.
Sunday, June 19, 2016
Section: 27
Hours: 6
I finished counter sinking and prepping the parts for the firewall assembly and then I washed and acid etched everything before lunch. By the time I started painting this afternoon it was well into the 90's. After priming the first couple parts the paint flow reduced. I stopped and cleaned the gun- when it is hot the epoxy flashes pretty quick and the nozzle sometimes gets plugged. When I went to start back up the flow was still low and then I noticed that the air compressor was not turned on. Duh~~~~
Hours: 6
I finished counter sinking and prepping the parts for the firewall assembly and then I washed and acid etched everything before lunch. By the time I started painting this afternoon it was well into the 90's. After priming the first couple parts the paint flow reduced. I stopped and cleaned the gun- when it is hot the epoxy flashes pretty quick and the nozzle sometimes gets plugged. When I went to start back up the flow was still low and then I noticed that the air compressor was not turned on. Duh~~~~
Saturday, June 18, 2016
Section: 26
Hours: 2
Deb helped me rivet the baggage ribs to the bottom skin. I set the assembly on the floor so we could easily reach the rivets.
Looks like all the flush rivets came out flush. Good job Deb!
Here's my side of the job.
Seat and baggage ribs are now attached to the bottom fuselage skin!
Section: 27
Hours: 6
I spent the rest of the day prepping parts for the firewall. The firewall has flush rivets throughout (except were marked on the plans) to make it easier to keep the engine side clean. All the reinforcing bars have to be counter sunk to accommodate the dimples in the stainless steel firewall bulkhead pieces. I did all the counter sinking on the drill press. I slowed the drill press down to the slowest setting and the counter sink cut nice and cleanly.
Hours: 2
Deb helped me rivet the baggage ribs to the bottom skin. I set the assembly on the floor so we could easily reach the rivets.
Looks like all the flush rivets came out flush. Good job Deb!
Here's my side of the job.
Seat and baggage ribs are now attached to the bottom fuselage skin!
Section: 27
Hours: 6
I spent the rest of the day prepping parts for the firewall. The firewall has flush rivets throughout (except were marked on the plans) to make it easier to keep the engine side clean. All the reinforcing bars have to be counter sunk to accommodate the dimples in the stainless steel firewall bulkhead pieces. I did all the counter sinking on the drill press. I slowed the drill press down to the slowest setting and the counter sink cut nice and cleanly.
Friday, June 17, 2016
Section: 26
Hours: 3
This morning I finished up riveting the baggage ribs to the bulkhead. I used the long bent stick in the rivet gun to reach these rivets.
The routing angles get in the way for riveting the center ribs. It took some real finessing to set the rivets in the inboard ribs.
I set the assembly on end on blocks on the floor and clecoed the baggage ribs. Tomorrow I hope to get some help riveting them to the skin.
Section: 27
Hours: 3
This afternoon I pulled the parts for the firewall assembly and started work filing, deburring, counter sinking, etc.
Hours: 3
This morning I finished up riveting the baggage ribs to the bulkhead. I used the long bent stick in the rivet gun to reach these rivets.
The routing angles get in the way for riveting the center ribs. It took some real finessing to set the rivets in the inboard ribs.
I set the assembly on end on blocks on the floor and clecoed the baggage ribs. Tomorrow I hope to get some help riveting them to the skin.
Section: 27
Hours: 3
This afternoon I pulled the parts for the firewall assembly and started work filing, deburring, counter sinking, etc.
Subscribe to:
Posts (Atom)